
The old saying what goes around, comes around seems to apply to shiplap. Once a popular form of exterior protection for homes, it seemingly fell out of favor until recently. Today, shiplap is not only applied to the exterior to protect the home from the wind and weather, it is now being used as interior decoration that helps to accent walls and the ceiling in some cases.
The renewed interest in shiplap means that adding it to your home will require the right type of nails to ensure that it is properly installed. But what exactly is shiplap?
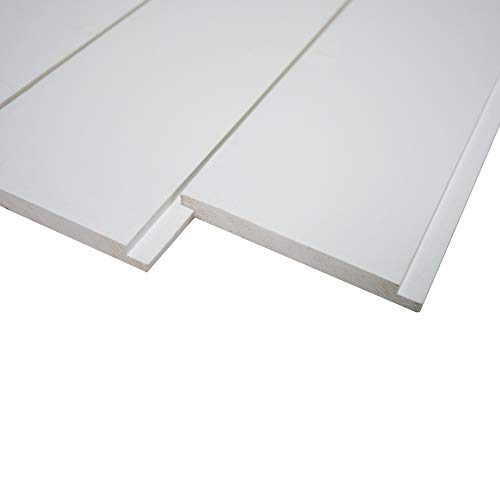
What is Shiplap?

Shiplap is a wood siding that features a rectangular tongue or rabbet joint on the ends of the board. When they are placed next to each other, the rabbets will overlap and create a strong connection. The result is that wind, weather, and the elements will not penetrate through as they would with panels that had flat or smooth edges.
The name shiplap comes from its original use in putting together slats to build wooden ships which made them watertight. Today, shiplap has become a popular interior décor that provides a beautiful accent to the walls. Installing shiplap siding on a plain wall can turn it into a center of focus. But putting shiplap together requires the right size nails for the job.
What Size Nails for Shiplap Cladding
Although shiplap cladding is unique in terms of how it is put together, the nails used are comparable to applying trim to the walls. This means that 18-gauge brad nails and 15 to 16-gauge nails, the same as you would use for baseboards, work well with shiplap.
This also means that you should either go for a brad nailer or a finish nail gun for shiplap installation.
The nail is large enough to hold together the different pieces but small enough not to cause splitting. The 15 to 18 gauge is the right nail size for shiplap with a recommended length of 1.25” or 1.75”. This is long enough to penetrate the shiplap and hold it to the wall, but short enough not to go too deep and hit conduits or electric lines in most homes.
Nail length for shiplap
As a general rule, the nail should penetrate 1-inch into the wall, stud or ceiling. This is excluding the thickness of shiplap itself and any other material such as drywall that reside between the panel and the stud or wall.
- 3/4-inch thick shiplap: 18-gauge brad nail with 1-3/4″ length.
- 3/4-in shiplap on 1/2-in drywall: 16-gauge nail with 2-1/4′ or 2-1/2″ length
Type of Nail Gun for Shiplap
There are three types of nail guns that are popular to use when attaching shiplap. For the most part, each nailer is designed to attach baseboards which is similar in terms of thickness and placement compared to shiplap.
- Brad
- Finish
- Framing
So how do you decide which nail gun is best for shiplap installation? The answer depends on the thickness of the panels.
The faux shiplap sidings that are used for interior decoration are essentially thin plywood panels. So, you need the nail to make the smallest hole possible, yet have enough strength to be able to securely attach the sidings firmly attached to the walls.
This is why the 18-gauge Brad nailer may be the most popular option for faux shiplap siding. It provides the proper amount of force along with nail sizes that make them well suited for shiplap. Like I explained before, faux shiplap is usually thin plywood panels and the 18-gauge brad nailer is perfect for the job.

Above: Makita AF506 Brad Nailer – Click to See Amazon Price
A finish nailer is a popular option as well given the size of nails and force used to drive them into place. If you use a nail gun such as a framing nailer, the nails will produce larger holes and you have to go back and fill these holes with wood filler or spackling.
Framing nailers are not suitable for thin faux panels. However, if you are cutting your own thick siding for exterior walls a framing nail gun can work very well.
What Size Nails for Shiplap over Drywall?
The standard 15 to 16-gauge nails work well with drywall. The key is not the drywall but attaching the shiplap to the studs behind the drywall.
You do not want the weight of the shiplap to be held by the drywall itself or it will crack and fall apart. By attaching the nails to the studs behind the drywall, that will carry the weight. Get a good quality stud finder to locate the studs accurately.
If the drywall is quite thin or subject to breaking apart when using nails, consider pre-drilling holes into the drywall and studs behind it.
Can You Install Shiplap Without a Nail Gun?
Yes, it can be done.
One popular option is to use mounting tape on the sides. This means when they are placed, they will stick to the wall thanks to the double-sided tape. You will need to clean the boards thoroughly to ensure that no dust or particles are present on the surface. Plus, you will need a hammer to tap the shiplap and get rid of any air pockets that might keep the tape from sticking properly to the surface.
Another option is to use a heavy-duty construction adhesive such as Liquid Nails to secure the panels on the wall or ceiling.
The other option would be to use the good old hammer and nail. However, if you need to install a large number of panels I suggest you get a power nailer and an affordable air compressor for the nail gun which will make your job a lot easy.
Shiplap Installation Tips
Paint or Sand First: The first tip is that if you plan on painting or sanding the shiplap, do so before nailing it into place. This is because of the overlap created by the shiplap makes it difficult to paint or sand once in place.
1/8th-Inch Rule: To ensure that you keep the boards 1/8” apart, use a coin such as a quarter or nickel placed between the planks to keep the proper spacing.
Hide the Nails: If you want a smooth appearance with no nail holes, then place the nails in the rabbets or tongues of the boards.

Using the right nail gun and nail sizes will help you attach the shiplap to your walls with ease. Remember that you do not have to cover the entire wall with shiplap. Inside many homes, the shiplap is used to accent the décor. So, you can use what you want to create the right look for your home.
Back to Contents

Dan Miller is a professional toolmaker with extensive experience in the metalworking and tooling industry.
An avid DIY enthusiast and passionate hobbyist woodworker, Dan shares his expert knowledge here.